8.15.2014

Stampin' Celebration Sketch Challenge #85

It's my favorite time of the month.  :)  Each month on the 15th there is a new sketch challenge at Stampin' Celebration.  This month our sketch will help you use up your scraps.


Isn't that the best?!  It would make a fabulous scrapbook layout, which you will see when you check out what some of the other designers have made.   Below is my take on the sketch.


Do you have any scraps of paper that you like too much to throw away?  Why don't you give this sketch a try.  Clicky to go there now and be inspired by the rest of the design team.

Stampin' Supplies:
Stamps: Hello There (SU-Hostess)
Ink: Surf Blue (SSS)
Paper: Hello, Sunshine (Lawn Fawn), Cotton Candy (SSS), Melon Mambo (SU)
Accessories: Stitched Rectangles (LID), Sewing Machine

8.13.2014

StampNation + Winnie & Walter = AWESOME

Inspiration Nation continues with a new photo that will be sure to get your creative juices flowing.  This week StampNation has a new sponsor, Winnie & Walter.   It was so much fun creating with their stamps.  You can see a peek at my card in the upper left corner.  I tried some new techniques with this card and had a lot of fun.


If you are a StampNation member, you have a chance to win a prize simply by creating a card and posting it in the current challenge.  :)   Just wait until you see the inspiration photo!


Not yet a member?  New members are welcome to participate.  Plus, you will get to see my exclusive video coming to classroom on Friday.  ;)


See you in the forums!

8.12.2014

Heart Colored Embossing Paste ~ PTI#176

Yesterday I was checking out a video on the Papertrey Ink blog and it so inspired me that I had to go down to the craft room and play with some embossing paste, ink and homemade cardstock stencils.


To create my own stencil I used my new Heart Border punch from Stampin' UP! and punched a row of hearts.   I adhered them the way Laura shows in her video.  Unfortunately the washi tape I used to adhere my "stencil" down ended up tearing my paper.  My plan was to make it more of a one layer card.  Happy accident though because I cut it down and added a strip of Lavender cardstock.  I might like this a little better than my original idea.  ;)


As I was playing with mixing colors I found that I had used WAY TOO MUCH embossing paste for the teeny tiny hearts.  I just couldn't throw all that scrumptiously colored paste away so I quickly grabbed another die cut that was laying on my messy desk and put it on a separate piece of white cardstock.  Now I have the beginnings of a brand new card.  Come back later in the week to see what I do with it.  Any suggestions?

Be sure to check out the link below for the video and challenge.

Make It Monday #176: Backgrounds with Embossing Paste

Stamping Supplies:
Stamps: Dress Form (PaperTreyInk)
Ink: Hawaiian Shores (PTI), Plum Pudding (PTI), Cadillac Pink Glimmer Mist (Tattered Angels), Sea Glass (SSS),
Soft Lilac Shadow Ink for the sentiment (Hero Arts)
Paper: Lavender (SSS), Whisper White (SU)
Accessories: Hearts Border Punch (SU), Dreamweavers White Embossing Paste


Hearts Border Punch by Stampin' Up!
Hearts Border Punch


8.09.2014

Sew Saturday

My first applique project is going very well.  The block is over half done.  Unfortunately I'm not at the point where there are several small points to turn and stitch.  This could take awhile, but I have the rest of the month to meet my August goal for ALYOF.

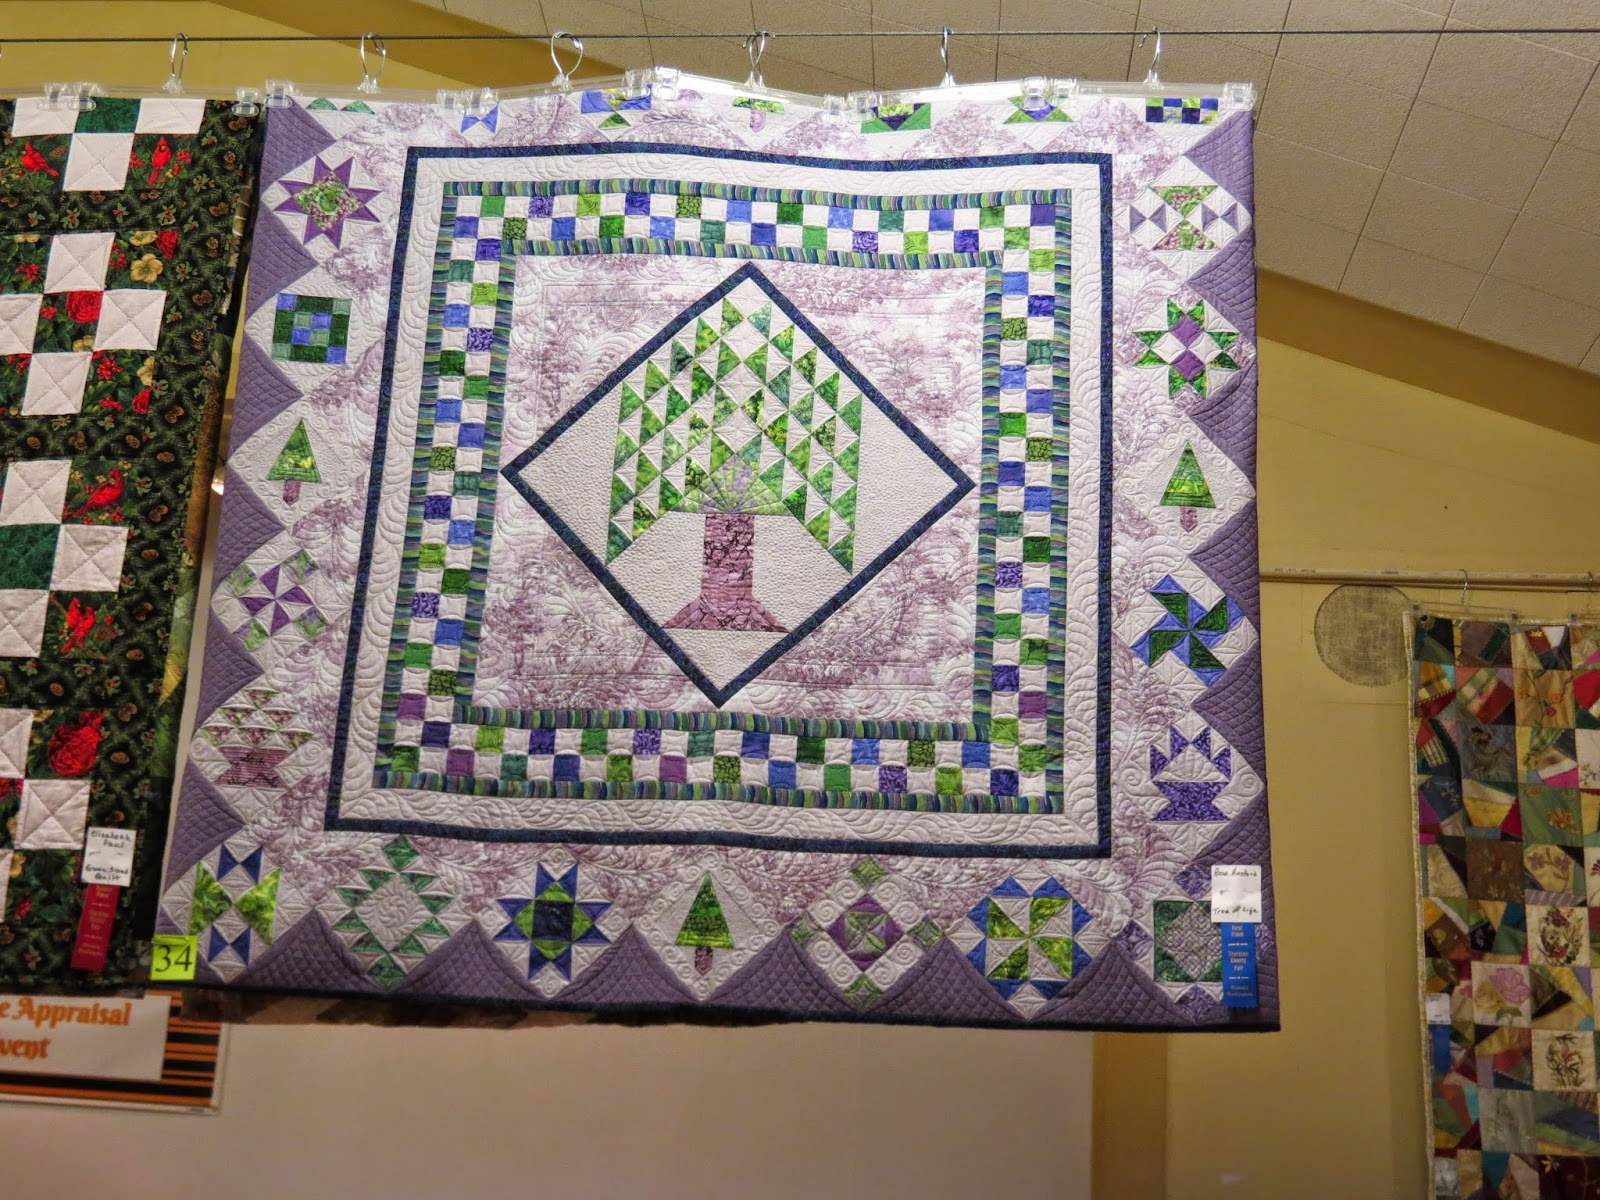
Last week was the Thurston County Fair.  Our quilt guild had a booth and after my shift volunteering I was able to take some pictures to share with you.  Each member that entered a quilt earned a ribbon. I'm so proud of our ladies.


 Pictured below on the top left is our quilt guild quilt.  It won a blue ribbon.  :)


Unfortunately I wasn't able to get pictures of all the quilts because there was a demonstration at one end of the hall.  At the other end of the hall were presentations from "Quilts of Valor".  I was honored to see 4 quilts given away during my time working the booth and soon after.


Last, but certainly not least, one of our South Sound Modern Quilt Guild members, Kathleen Buchli, won people's choice on Thursday for her quilt pictured on the far left.  It inspired me to make the card you saw on my blog yesterday.  ;)


I never found the cards or scrapbooks.  By the time my shift was over it was too hot to go looking.  Next year, if I work up the courage, and keep one of my own quilts, I just might enter something.  Have you ever entered something in a local fair?  What was your experience like?

8.08.2014

Hello, Friday!

Friday is here at last.  Let's celebrate this special day with a colorful card inspired by CAS(E) this Sketch and the new Tag You're It challenge.

CTS#87
TYI#3

Hopefully it is pretty easy to see how I was inspired.  My rainbow of chevron stripes were created with my newest stencil.  Don't you just love them?  After I sponged on the Distress inks I sprayed them with a little water to get them to blend.  


***Simon Says Stamp is having a sale on all their Ranger products.  Save 20% by using code RANGERSALE.

Stamping Supplies
Distress Ink (by Ranger): Evergreen Bough, Festive Berries, Peacock Feathers, Picked Rasperry
Paper: Black (SU), Woodgrain Embossed (EH), Doll Pink (SSS)
Accessories: Zig Zag Stencil (SSS), Embellished Tag (Mama Elephant), Hello Script (Memory Box), Black Twine (Pretty Pink Posh)

8.06.2014

Inspiration Nation Sneak Peek

All month long we will making cards inspired by the amazing photos Maureen has chosen for us.  She has a gift for finding photos that evoke emotion.   For the first photo I wanted to capture the whimsical feel of the dandelion fields.  Here is a peek at what I came up with.


We also have a new guest designer this month, the uber talented Gayatari.  It's going to be an inspirational month at StampNation!   Here is a peek at what the entire dream team designed.


Want to see more?  Head on over to the challenge forum at StampNation.  Not yet a member?  Join today by clicking the button below or click HERE to learn more about this amazing community of paper crafters.


8.05.2014

So Sweet of You

Last week I made card using an old sketch challenge.  Lately I have been loving almost anything with aqua in it and this pack with pinks, aquas, blues and greens is no exception.  The colors are so soft and pretty, don't you think?  I wanted to make a card just to showcase the pretty paper.


I stamped the sentiment directly onto the patterned paper with Lost Lagoon ink, and added flowers and rhinestones to really draw the eye to that part of the card.  At first the flowers were lost against the paper so I softly inked them to make them stand apart from the background. 


Stamping Supplies
Stamps: Hello There (SU-Hostess)
Paper: Sweet Life 6x6 Bundle (MF), Lost Lagoon (SU)
Ink: Lost Lagoon, Rose Red
Accessories: Basic Rhinestones (SU), Itty Bitty Punch Pack, Scallop Circle Punch, Circle Framelits (SU)

Hello There Clear Stamp Set by Stampin' Up!
Hello There ~ Hostess

Itty Bitty Accents Punch Pack by Stampin' Up!
Itty Bitty Accents Punch Pack

8.04.2014

Sew Monday ~ ALYOF August Goals

Now that August is here it is time to set my monthly goal for A Lovely Year of Finishes.  Back in December or January I signed up for a Holiday Chic block of the month club at Ruby Street Quiltworks.  Each month we get a new pack with our supplies to make the block.  So far I have completed ZERO blocks.  I've never tried needle turn applique before so I was extremely nervous to start on this beautiful project.  This month  I am setting a goal to complete my first needle turn applique block.  If I don't make it a goal, it will never get done.


The vase in the upper left corner is my goal.  The picture shows the potential of what this quilt could become.   The hardest thing so far is figuring out where to get started.

I decided to start with the neck of the vase because the base and leaves both go over the neck.  To make it easier on myself I used fused the tiny pieces you see next to the red stick pin.  I couldn't figure out how to turn under that tiny black piece and I knew that would not be the best way to start my needle turn applique experience.  There was a good chance I would never try again if I had started there.  So far I have the inner curve on the right side of my vase neck sewn down.  It was easier than I thought it would be.   I find that I really enjoy sewing by hand when the stitches are hidden.  It's relaxing and nobody can see the uneven mess I make of the backside.


  Now it's your turn.  You still have 2 days to sign up with your August goals.  What would you like to sew this month?

ALYoF2014
ALYOF ~ August


8.01.2014

You're A Star * Stampin' Celebration August

August is here and that means many of us are gearing up for back-to-school.  Say, what?!!  I'm not ready!  Ok, a small part of me is ready to have a quiet house for a few hours, but I do dearly love the relaxed schedule of summer and extra time with my boys.  My friends in CA will be sending there kids off to school in the next couple of weeks, so I suppose it is time to start creating cards for teachers, helpers and our kiddos lunchboxes.


Stampin' Celebration is going to help us get in the back to school mode with this fun photo challenge.  In honor of the bright yellow school bus and primary school colors I have made this card that I think any child would love to find in his or her backpack.


The background was created using Stampin' UP!'s new hearts and stars stencil and white embossing paste.  I set it aside to dry, which didn't take long in the hot garage, and then sponged over the entire piece with Daffodil Delight ink.


The star die cut was actually leftover from another project.  It was too cute to throw away.  The sentiment panel was cut from the same background piece I had created for the star.  Again, a scrap I couldn't throw away.  It's ok to save your scraps and use them later.  Just give yourself a deadline to use it and then throw it away.  (For me that deadline is when my scrapbox gets too full to put any more scraps in.)

Stamping Supplies
Stamps: Pictogram Punches (SU)
Ink: Daffodil Delight (SU), Calypso Coral
Paper: Whisper White, Maritime DSP
Accessories: Coastal Cabana Thick Baker's Twine (SU), Dreamweavers White Embossing Paste, Hearts and Stars Decorative Masks (SU), Tag Topper Scallop Punch (SU)


Pictogram Punches Clear Stamp Set by Stampin' Up!
Pictogram Punches

Hearts & Stars Decorative Masks by Stampin' Up!
Hearts and Stars Decorative Masks
Tag Topper Scalloped Punch
Tag Topper Scallop Punch
Coastal Cabana Thick Baker's Twine by Stampin' Up!
Coastal Cabana Thick Baker's Twine


7.31.2014

Sew Saturday on Thursday ~ ALYOF

I'm cutting the deadline for A Lovely Year of Finishes close this month. Today is the last day of the month and I am happy to report my Michael Miller quilt top is finished.


It is too late to enter it into the Modern Quilt Guild Michael Miller fabric challenge, but just in time for A Lovely Year of Finishes.  Right now I have no clue how I am going to quilt it, but I do have a couple of ideas for the back.  Here is the quilt while I was trying to decide which border to add.


My first thought was to use the small scraps of fabric together to form a border, but it really distracted from the design of the quilt itself.  I started to set them aside, to the right of the quilt and this cool pattern started to form that may just work itself into the back.  Time will tell.  For now I am going to put it away and work on some colors I actually like.  ;)


Header Image

Tomorrow I will be at the South Sound Modern Quilt Guild booth at the Thurston County Fair.  If you are local, stop by and say hi.  I'll be there between 1-4pm.  It's my first time going to the Thurston County Fair.  Hopefully it won't be too hot.  My plan is to work on hand sewing the binding for my Modern Metallic quilt.  I'm looking forward to seeing all the quilt, scrapbook and card exhibits.  I'll try to take some pictures to share with you.