10.30.2015

Charlie Brown Tree Video Tutorial

Sorry this post is up so late today.  I've been trying all day to get my simple video loaded on youtube.  Not sure if it was the windy storm that caused my internet to have issues or if it was youtube.  Thankfully a restart and an update did the trick.  It's finally up.  Better late than never, right?


I got several questions about this card I posted last week and I thought it might be easier to do a video than try to type out a tutorial.


Clicky to see original post
I'm still fighting the cold my husband brought him from work last weekend.  I feel better, but I sound a bit snarfly.  Sorry you will hear a few sniffles in the video.  I tried to edit most of them out.

https://youtu.be/66Lr_DALnuE

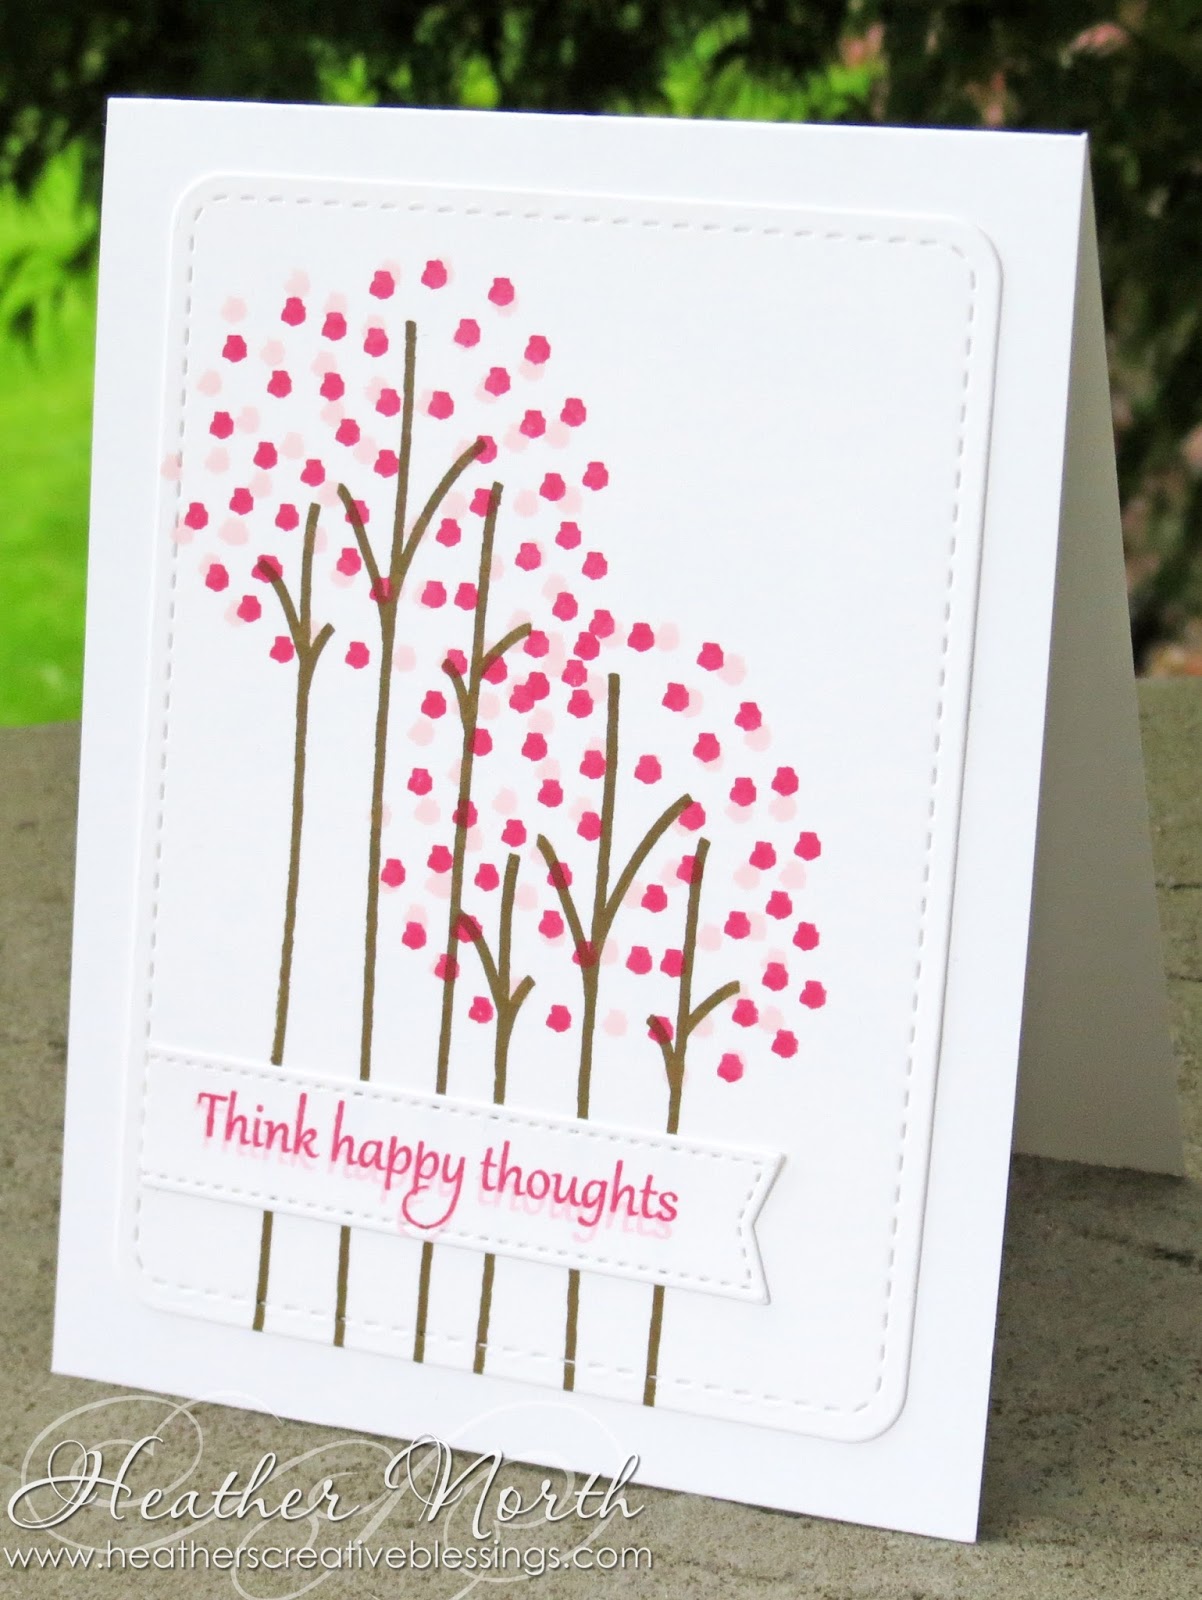
For this video I used the tree from Bright Baubles that was in the Stamp of Approval collection, but you could try this with any tree or branch stamp.

Supplies:
Stamps: Bright Baubles (Neat & Tangled for SOA) Snowy Sayings (CASual Fridays for SOA)
Ink: Daffodil Delight, Soft Suede, Soft Sky (Stampin' Up) Soft Blossom, Soft Purple, Raspberry Jam, Tide Pool (Hero Arts) 42 (Zig Clean Color Real Brush Marker)
Paper: Marshmallow (Bazzill) Soft Suede (Stampin' Up!)
Accessories: Blueprints 20 Dies (My Favorite Things) Yellow Stickles


10.28.2015

Pink Positive Thoughts & Prayers

Today I have pink thoughts and prayers on my mind.

Today my sister in law is in labor with my niece.

Today my friend goes in for surgery to have a lump removed from her breast.

Today life begins.

Today life changes.


If you would like to see my video on how to color glimmer paper you can watch it here: Clicky

Just a couple of tweaks for the second card.  Dropped the glitter and added a stitched banner.


Do you have anyone you are sending pink positive thoughts to today?


Stamps: Calm & Gentle (CASual Fridays Stamps)
Ink: Melon Mambo, Pink Pirouette, Tip Top Taupe or Soft Suede (Stampin' Up!)
Paper: Dazzling Diamonds Glimmer Paper, Whisper White (SU)
Accessories: Blueprints 20 (My Favorite Things) Rounded Stitched Rectangles (Lil Inker Designs)

10.26.2015

Power of Pink ~ Coloring Glitter Paper Video

All month long I have been going pink on my blog to raise awareness for breast cancer.  The earlier we catch it, the "easier" it is to treat & cure.  I encourage you to do your monthly self exam and schedule your mammogram if you haven't had one this year. 


I planned on showing this card last Friday, but wasn't able to get the video edited until today. If you want to learn how to color your dazzling diamond glitter paper and make it into any color you want, then watch the video below.  It's easy.  I promise!


As fate would have it, when I went on Facebook this morning I saw that Chaitali Nara is hostessing a Pink Power blog hop.  She designed this stamp set and I am so glad she did.  Hop on over to her blog and leave her some love.  clicky Then check out the what the rest of the ladies have designed and be encouraged.  We are a sistah-hood and we are in this together.  If you or someone you love is fighting this disease know that I am thinking of you and praying for a cure. 


Stamps: Pink Power (Verve)
Ink: Spun Sugar (Distress) Onyx Black (Versafine) 003, 25, 22 (Zig Clean Color Real Brush Markers)
Paper: Black and Dazzling Diamonds Glimmer Paper, Whisper White Thick Cardstock (Stampin' Up!)
Accessories: Clear Embossing Powder (Stampin' Up!) Blueprints 20 (My Favorite Things) Ribbon Die (Verve)

Pink Power

10.25.2015

Sew Sunday ~ ALYOF October

This month I set my goal low for A Lovely Year of Finishes.  Mostly because I have lots of small projects that needed to get done.  I'm happy to say I met my October goal!


Unfortunately I did not get a picture of my bag.  :(  Thankfully our guild president, Melissa Dunworth, did take a picture of all our bags, so I do have some proof.  Mine is the bag in front on the far right.  Behind it is the orange bag I got back in the exchange.  :)   I do have a close up of that picture.


Adding a zipper was not as difficult as I thought it would be. I'm glad our guild had this swap so I would be "forced" to get over my fear and give this a try.
alyof2015
October Finish Party

My brother is going to be a dad soon, so I started a new quilt for my niece.  :)  This will definitely be my finish for November because I want to finish it before I go down to CA to meet her.  <3   I shared this picture on instagram, but I don't think I have on my blog.


The fabric is from a Riley Blake layer cake.  I learned the hard way that not all the squares were perfectly square.  Halfway through I had to trim and square up every square on ALL 4 SIDES!  What a pain.  It's my first time using a layer cake.  In the future I will double check their blocks before I start.


The patterns are cute though, and the fabric is so soft and buttery.  That makes it  nice to work with.  I'm taking part in a quilt along online to make this quilt.  I love that I can have my iPad in my sewing room to watch, pause and replay the videos while I quilt.


Be sure to link up your finishes with Melissa & Shanna.  Today I am fighting a cold my husband brought home with him this weekend and I'm working on some hand applique while we watch football and movies.  :(   I don't to work on the baby's quilt while I am sick, and honestly I am more likely to make mistakes while I am sniffling, sneezing and coughing.  

10.21.2015

Frame It ~ Merry Monday #175


Do you like to send out handmade Christmas cards?  If so, how are you doing on your goals for the upcoming season?  I'm not sure how I am doing, but I know I need tons more. ;)  That is why I am trying to play along with the Merry Monday challenge each week until Christmas. This challenge is a great jump start to my Christmas creativity.

MM#175

This weeks challenge is great for creating a focal point.  Simply put a frame on it!

Supplies:
Stamps: Holiday Flourish (The Ton for Stamp of Approval) Snowy Sayings (CASual Fridays for SOA)
Ink: Golden Glitz Delicata) Black (Staz On) Old Olive, Always Artichoke, Real Red, Cherry Cobbler (Stampin' Up)
Paper: Whisper White (SU) Patterned Paper (Misc. Stack from my stash)
Accessories: Blueprints 20, Stitched Square Frames (My Favorite Things)


10.20.2015

Giveaway Winners Announced

Did you catch the announcement of the 2 winners for the Holiday Magic Collection box?  It was posted on Catherine's blog on Satuday.  If you missed it, no worries, I did too.  Clicky to see if you were one of the names drawn!


Last week the challenge at StampNation was to create a Christmas card.  Pretty easy, since I have Christmas cards  on my creative mind lately.  I decided to CASE a card of Catherine's from a year or 2 ago and make a snowy branch using the tree from one of the stamp sets in the Holiday Magic Collection.


One of the details I love about this card is the Little Bits layered with glittery paper.  It adds dimension to the card without adding bulk.  Perfect for Christmas cards that need to be mailed.  Would you like a sneak peek of the card going up for the challenge tomorrow?  It's a twist on the challenge theme using the Flourishes & dots from one of the stamp sets in the SOA Holiday Magic Collection along with one of the dies.  This time I pulled out supplies from my stamp room to add the finishing details like faux stitching and confetti dots.


My hope is that I will have time this week to film a quick video showing you a SUPER EASY way to custom color your glitter cardstock.   It's what I did to get the pink sentiment you see in the peek.


Yesterday I spent some time in my craft room making a couple more Christmas cards.  When I first saw the Bright Baubles stamp set I thought the big tree would make a great Charley Brown Tree.  It's photopolymer, so it is easy to bend it on the stamp block before stamping.   I used Zig Clean Color markers and a spritzer bottle to create my snowbank.  The finishing touch was adding glossy accents and stickles to make my card shine.  

Supplies:
Stamps: Bright Baubles (Neat & Tangled for SOA) Snowy Sayings (CASual Fridays for SOA)
Ink: Daffodil Delight, Soft Suede, Soft Sky (Stampin' Up) Soft Blossom, Soft Purple, Raspberry Jam, Tide Pool (Hero Arts) 42 (Zig Clean Color Real Brush Marker)
Paper: Marshmallow (Bazzill) Soft Suede (Stampin' Up!)
Accessories: Blueprints 20 Dies (My Favorite Things) Yellow Stickles


10.19.2015

Merry Inspiration Monday ~ SC115

It's time for another Stampin' Celebration Sketch challenge.  As soon as I saw this sketch I thought of Christmas trees.

SC116
I stamped my trees in two different colors and layered them on a circle of vellum to help them stand out from the patterned paper in the background.  The vellum is hard to see in the picture, but that is ok.  Next I stamped the sentiment on vellum and colored the back side with my makers.  I adhered it to my trees with glue dots and hid those behind Candy Dots.


Be sure and check out what the rest of the design team did with this sketch.  Clicky to go there now and then link up your creation so I can see how you are inspired!

Stampin' Up! Supplies Used
Stamps: Festival of Trees, White Christmas
Ink: Cucumber Crush, Cherry Cobbler, Black Staz-On
Paper: Crumb Cake, Very Vanilla, Whisper White  (+ misc. Christmas paper)
Accessories: Tree Punch, Circles Framelits, Regals Candy Dots

Festival of Trees Photopolymer Bundle by Stampin' Up!
Festival of Trees Bundle