Showing posts with label Beau Chateau. Show all posts

5.30.2012

I2S Creative Sketches

Today I am a "guest blogger" again over at Inspired to Scrap.   Be sure to check out their blog AND their forum.  The forum is where I found today's sketch.

If you've been following me for awhile, you know I love using sketches.  I use them for cards and scrapbook layouts.   They can be used exactly as shown or as a great jumping off point for inspiration.  Sketches can be flipped, rotated, mirrored, doubled, or stretched.  You can add elements or take them away.  


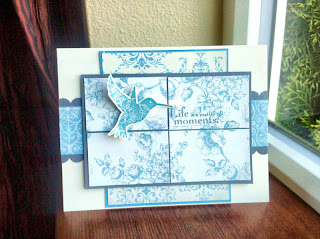
My challenge for you today is to use a sketch on a layout and then take what you have leftover (paper, embellishments, etc.) and use the same sketch to make a card.   Below is my sample.


My layout came first.  I'm doing an album of a Shop Hop adventure I went on shortly after moving here.  It was a great way for me to explore the area and find where all the best LSS were.  :)  (LSS= Local Scrapbooking Stores)


You can use the same sketch I did or find one of you own.  Check my blog all week.  I'll be using a different sketch every day.   (Monday does not have the sketch included in the post, but I'm sure you can figure it out.

P.S.  If you like the Beau Chateau paper I used in my samples today, be sure to pick them up NOW.  Tomorrow is the last day they will be available if they haven't sold out already.   This is my all-time favorite SU paper pack. 

Creative Blessings,
Heather North

Colors Used: Marina Mist, Very Vanilla and Basic Gray
Beau Château Designer Series Paper - by Stampin' Up!
Beau Chateau DSP
Elements of Style - Clear-Mount Stamp Set - by Stampin' Up!
Elements of Style
Scallop Edge Border Punch - by Stampin' Up!
Scallop Edge Border Punch


Stampin' Dimensionals - by Stampin' Up!
Stampin' Dimensionals

5.11.2012

You're a Gem of a Mom ~ Try Stamping...

On Mother's Day is nice to remember some of the moms in your life who inspire and encourage you.  Do you have friends that are awesome moms, is there a co-worker you look up to for advice, is there a lady in your church that offers a comforting hug each time you see her?  Perhaps you could give these ladies in your life a card.  It doesn't even have to be on Mother's Day.  Think about your friend's mom that has been like a mother to your.  Remember your aunts and grandmas.  Perhaps you could give a card to your daughter or daughter in law letting them know how proud you are of the mothers they have become. 


I found a new challenge blog... Try Stamping on Tuesday.  I thought this week's challenge would be perfect for a Mother's Day card for my friend.  <3  Turns out, I like this better than both of the cards I already sent out to my mom and mother in law. 

Try Stamping on Tuesday

One of the things I love about this card is that the background paper takes center stage.  Even if you don't do stamping, you can make this card.  Leave the bottom blank, like the sample or use title stickers, abc stickers or even hand write a sentiment if you choose.

To get a wider ribbon, I just did 2 rows of the ruffled ribbon.  The Marina Mist ribbon you see running down the center was an afterthought.  I had finished the card and was attempting to clean off my craft space when I saw that piece of ribbon and decided to lay it across the Blushing Bride ribbons.  I love how it looks! 

Even the inside is decorated.  Originally I was going to take the You're A Gem sentiment and have it hanging from the ribbon like a tag, but I changed my mind and decided to put it on the inside of the card.  The background flower was stamped from Mixed Bunch with Blushing Bride ink.

I hope my friend likes this card.  If not she can send it back to me and I'll keep it.  :) 

Creative Blessings,
Heather North

P.S.  Do you want to have the new 2012-2013 Stampin' UP! catalog sent to your door for FREE?  Simply place an order, of at least $25,  through my Stampin' UP store by the end of the month and I'll send you a catalog as soon as they are released.  :)


Beautiful Wings Stampin' Up! Embosslits Die - by Stampin' Up!
Beautiful Wings Embosslit

Beau Château Designer Series Paper - by Stampin' Up!
Beau Chateau DSP

Marina Mist 1/8 Inch Taffeta Ribbon - by Stampin' Up!
Marina Mist 1/8" Taffeta Ribbon

You're a Gem - Clear-Mount Stamp - Clear-Mount Stamp Set - by Stampin' Up!
You're A Gem
Retiring

Mixed Bunch - Clear-Mount Stamp
Mixed Bunch

Teeny Tiny Wishes Stamp Set - by Stampin' Up!
Teeny Tiny Wishes
Basic Pearls Jewel Accents - by Stampin' Up!
Basic Pearls

4.06.2012

Happy Easter Chick

The Beau Chateau paper pack is PERFECT for Easter cards.  They make the prettiest Easter eggs.  Perhaps I should try wrapping a strip of this paper around a real egg for Easter Sunday.

To make these hatching chicks I used the XL oval punch and punched out my DSP, then I cut the top 1/3 off in a zig-zag pattern.  Next I punched out 3 birds using the bird punch, I cut off the tails so they would fit in the egg and used some markers to color in the beaks and eyes. 


The inside of the card is decorated with a scrap of that Beau Chateau paper and the sentiment comes from Heaven Blessed in the current 2012 occasions mini catalog.


Good Friday to you!

Creative Blessings,
Heather North
Additional Items Used:
Punch: Word Window, Decorative Label
Paper: Very Vanilla, Soft Suede
Ink: Soft Suede
Markers: Basic Black, Pumpkin Pie
Heaven Blessed - Clear-Mount Stamp
Heaven Blessed Stamp Set
Bird Punch - by Stampin' Up!
Bird Punch
Extra-Large Oval Punch - by Stampin' Up!
Extra Large Oval Punch
Beau Château Designer Series Paper - by Stampin' Up!
Beau Chateau DSP

3.04.2012

Scrapbooking Sunday


My 2009 album is slowly coming along.  Here are the layouts I created last week.

The paper I used for this layout had a grid on either side.  I used that to my advantage and did my  journaling on those lines.  :)

Fun little tag I made.  Did you know you can print on vellum from your home printer?   I didn't print this one, but I did use the Decorative Label punch to punch it out.  Then layered it onto my cardstock, punched out the corners with the Ticket Corner punch, and added dash lines with the fine point of my Basic Black Stampin' Write Marker.   It still needed a little something, so I added the eyelet and thread some Island Indigo Bakers Twine through the hole. 

Island Indigo Baker's Twine
Island Indigo Bakers Twine
Decorative Label Punch - by Stampin' Up!
Decorative Label Punch
Ticket Corner Punch - by Stampin' Up!
Ticket Corner Punch
Basic Gray Stampin Write Marker - by Stampin' Up!
Stampin' Write Marker

On the opposite page I made a banner using most of the same elements.  This ties the two pages together without having a complete mirror of embellishments.  I really like the way the Bakers Twine looks wrapped 3 times around the end of the banner. 

This layout came together exactly how I pictured it.  I love when that happens!  The pages were pretty easy to put together.  To make the border:
1. Cut (4) Strips of patterned paper 1 1/2" x 12"
2. Cut (4) Strips of coordinating cardstock  1" x 12"  (I used Pacific Point here)
3. Use the Scallop Trim Border Punch on all four of the 1" strips and layer together with your 1 1/2" strips.

Scallop Trim Border Punch - by Stampin' Up!
Scallop Trim Border Punch


Recently I figured out that I have a difficult time making masculine cards, and feminine scrapbook pages.   After all these years of scrapbooking my boys, making "boy" pages comes easy.  Usually I make cards to send to my friends, mom and mother in law, so making "girly" cards is far easier for me than coming up with an idea for a masculine card.  Go figure.  Practice makes perfect, so I will continue to stretch and grow and try new things until these projects become easy too.  :)

All that was said, to tell you I spent HOURS working on the pages below.  Had they been boy pages they would have been done in less than an hour.  That's not a bad thing though, because I had so much fun making this layout of my friend's sweet daughter.  <3  If you find yourself struggling with creativity I encourage you to keep trying. 


So many fun things were used on these pages!  The purple background paper was something I got for my 2007 Disney album, and the green paper was just scraps I had leftover that were too pretty to throw out. 

The picture above is what I spent the most time on.  I kept pulling things out of my "stash" and playing with them.  In the end, I LOVE what I cam up with.  It's not all Stampin' UP!, but I will list the products that are below for you.
Beautiful Wings Stampin' Up! Embosslits Die - by Stampin' Up!
Beautiful Wings Embosslits
Sweet Shop Jelly Bean Brads
Beau Château Designer Series Paper - by Stampin' Up!
Beau Chateau DSP

Twitterpated Designer Series Paper
Twitterpated DSP

Basic Pearls Jewel Accents - by Stampin' Up!
Basic Rhinestones
Here are the details for the butterflies.  I cut them out using my die cutting machine in Whisper White.  Then I took some Blushing Bride Cardstock and stamped it randomly with one of the Mixed Bunch blossoms in Blushing Bride ink.  then I ran that through the cutting machine.  It's a subtle detail.  If you look closely you will also see some Basic Pearls on some of the butterflies in this 2 page spread.


 Do you see that button in between the 2 butterflies?  I made that by punching out the "flower" from my background paper, and adhering it to the clear bitty buttons.  Sweet!
Bitty Buttons - by Stampin' Up!
Bitty Buttons

Punch Pack - by Stampin' Up!
Punch Pack
As you can see I "had" to play with almost every "girly" thing I own on this layout.  :) 

After spending hours on the girly page, I took me 10-15 minutes to whip out this bad boy. I do like the look of this layout, especially the left hand side.  It helped me to get lots of pictures onto these 2 pages.

Baja Breeze Stampin Write Marker - by Stampin' Up!
Baja Breeze Marker
Now I'm curious about you.  Have you found it easier to craft for one gender over another?  Have you found that changes based on what you are creating?  Now that I know why I struggle in certain areas it should be easier for me to conquer the challenge of creating for the sexes. 


Creative Blessings,
Heather North